Required Permissions
The below permissions are all related to checklists and depending on the action the user is trying to take, they may need more than one of the permissions.
EditProtocolChecklist - Ability to manage ProtocolChecklists
ViewProtocolChecklist - Ability to view ProtocolChecklists
Other Protocol Permissions are required to access protocols
Accessing Protocol Checklists
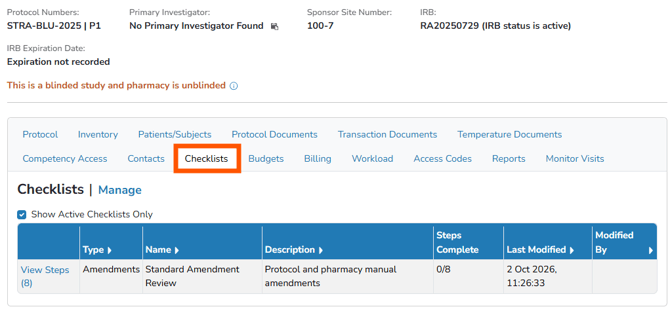
Protocol Checklists can be accessed from a protocol in either Build or Live mode. Open the applicable protocol, select the Checklists tab, and then select Manage to create a new checklist or manage an existing one.
Creating a Checklist
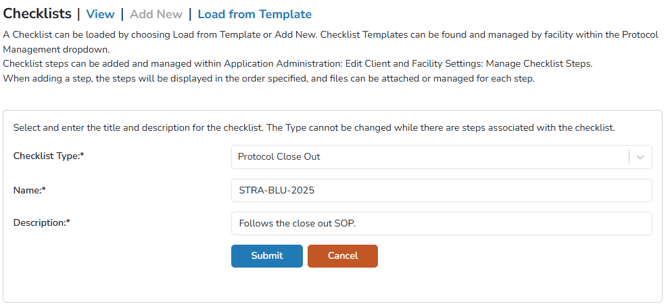
Creating a protocol checklist is quick and can be completed in a few steps.
- Navigate to the Protocol
- Click on the Checklists Tab
- Click Manage
- Click the Add New link
- Select the Checklist Type from the dropdown menu
- Enter a Name for this checklist
- Enter a Description
- Click the blue Submit button
The newly created checklist will be visible in the active checklists.
Adding Steps to a Checklist
After creating a new checklist, or adding to an existing checklist, we need to add individual steps to the check list. This section requires Checklist Steps be created prior to adding steps to a checklist.
- Navigate to the Protocol
- Click on the Checklists Tab
- Click Manage
- Locate the checklist to add steps to and click on Manage Steps
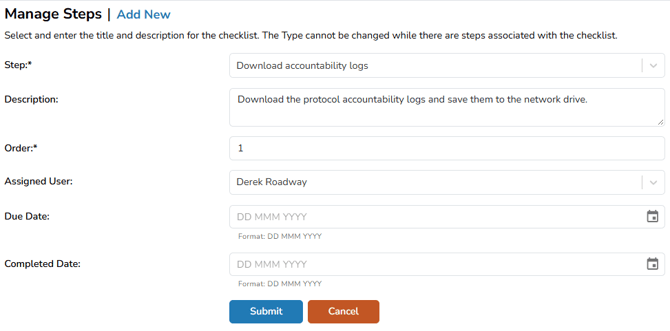
- Click Add New
- Select a Step from the dropdown menu
- (Optional) Add a Description - This can guide the user on how to complete the step.
- Set a numerical number for the Order. This can be edited later after more steps were added.
- (Optional) Assign a User from the dropdown menu. Assigned users get an alert in the Protocol Operations Alert tab
- (Optional) Add a Due Date
- (Optional) If the step has been completed and you are adding to log the step, add a Completed Date
- Click the blue Submit button
- If additional steps are needed, start over at step 5
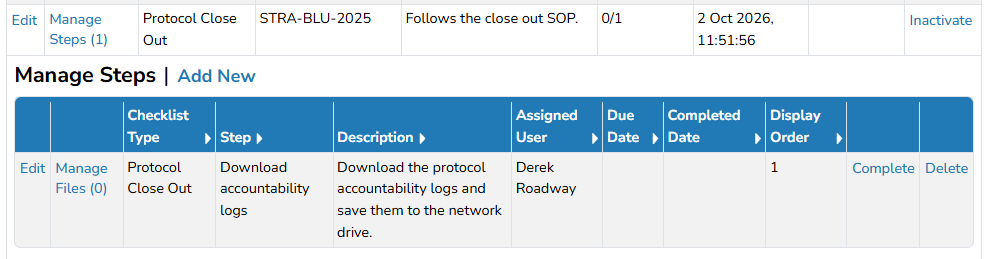
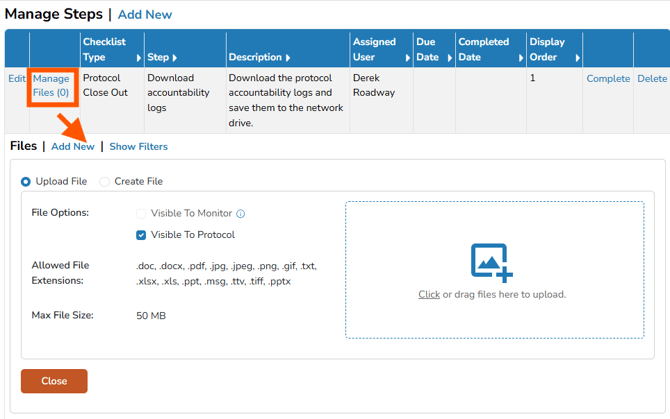
Managing Checklist Documents
Supporting documents can be added to individual checklist steps to keep relevant materials connected to the associated activity. To add or review documents, select Manage Documents next to the applicable checklist step. Repeat this process for each step that requires supporting documentation.